The first thing that needs to be done is the shortening of the RGV swinger pivot tube. Remove all the linkages from the swingarm for now.
The RGV swinger will measure about 205mm, and the LC frame should measure about 200mm, so you will need to take about 2.5mm off each side of the swingarm.
Once you have the swingarm fitting into the frame, you need to decide how you are going to mount it.
You can either drill the LC frame holes big enough to take the RGV pivot bolt, or you can make bushes to allow the LC bolt to fit the RGV pivot bearings.
For my project, I chose the latter.
Having access to a lathe at home, I put the RGV pivot bolt into the lathe, and boared the inside slightly larger to fit over the LC pivot olt. This meant that the pivot was now the
right size to fit inside the RGV swingarm bearings.
You should now be able to mount up the RGV swingarm to the LC frame and bolt the linkages back up to it.
By doing this, you can then work out how the top and bottom linkage mounts will fit.

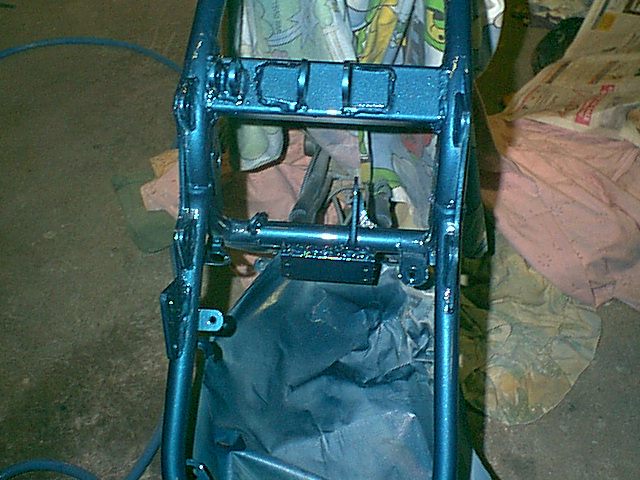
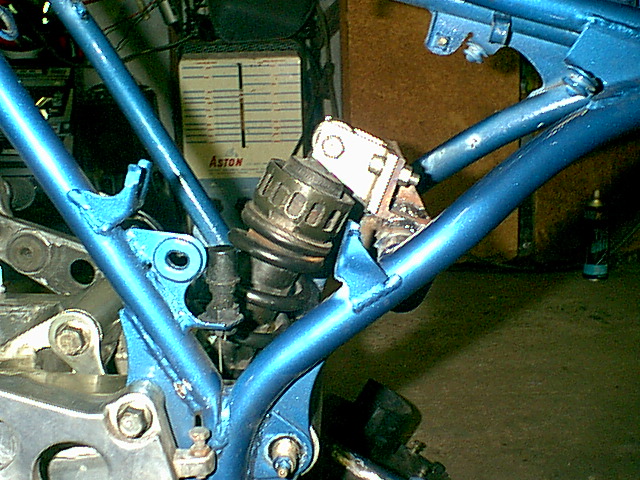
This picture shows the two mounts welded to the frame.
The top mount is just 50mm x 50mm x 6mm angle iron. We also welded a couple of triangle pieces in behind it to stop flex.
The original RGV top mount will then bolt up to the angle.
Once you have done this, you can turn the frame up side down and see where you need to weld the next mount.
For the bottom mount, we used a small piece of 25mm x 50mm box tube. The tube was positioned about 25mm back from the original centre stand mount, and twisted into place so that the bottom of the box tube followed the original shape of the frame. Mounting it here should mean that if you move the linkage up to the tube, it should line up pretty close to the middle of the box tube. As shown below.
Attention!!!!!:::: We have found a large, and VERY stupid flaw in designing the mounts this way. After mounting everything up, and checking chain alignment, we found that the new mount on the bottom interferes with chain operation. To get around this, I have had to cut and re-weld the mount to allow for some clearance for the bottom of the chain. You can still use my method of mounts if you wish, but you will have to do the same as I have. Alternatively, you could use the original RD centre stand mount (which I have cut off) and make extension mounts for the swingarm linkages and rear caliper support.
Heres a couple of pictures of my mods.

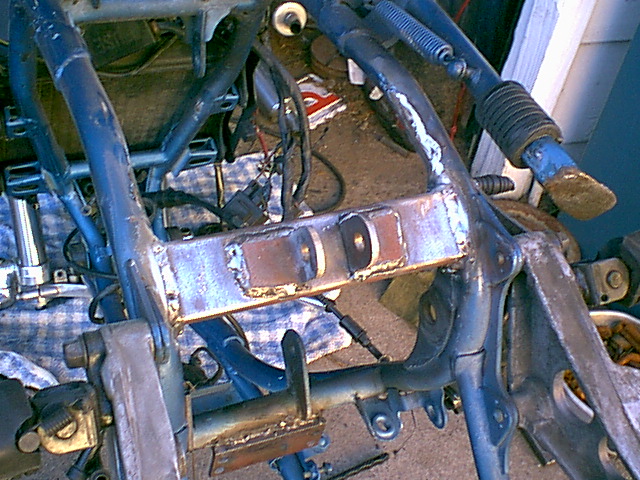
Cutting the box in this way leaves a triangular tube section at the bottom of the mount
which should be plenty strong enough for the application.
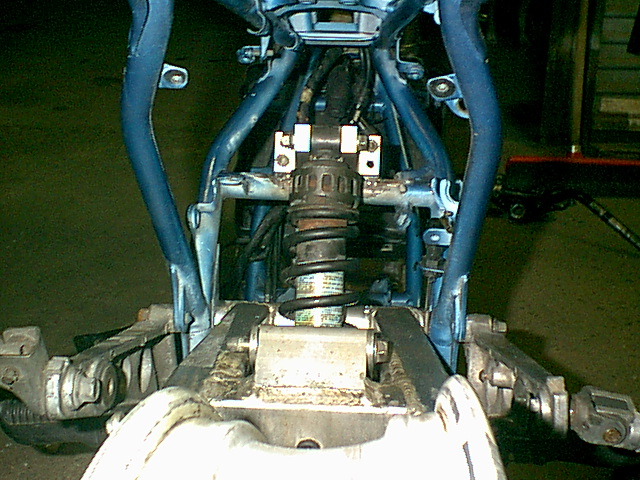
It should be noted that I have also decided to lower my rear shock by about 20mm to lower
the rear of my bike and to allow better clearance over the top of the mount.
The rest of this document should be fine.
If you havent done so already, bolt up the top of the shock to its new mount, and double check that the swingarm is going to be at a good height with your bottom mount where it is.
Its alot easier to make changes while the tube isnt welded to your frame!
Once you have varified that everything is in the right place, weld the box tube to your frame. After it is welded in place, you can use an angle grinder and grind off your centre stand mount tube to save on some weight.
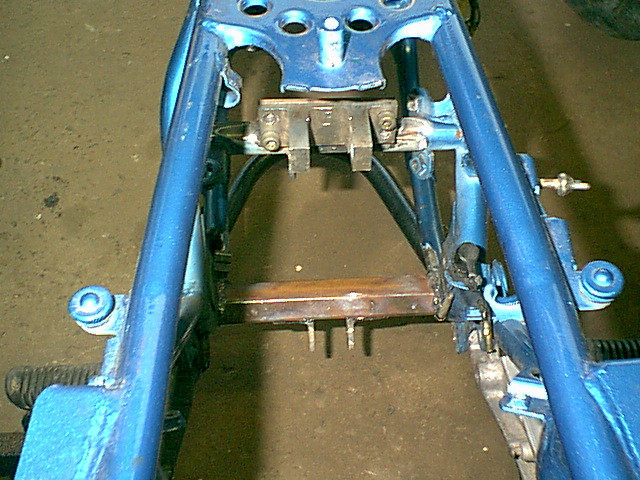
Next, you need two more pieces of the 50mm x 50mm angle cut to about 30mm wide each. This will be used for the actual mounts as shown in the picture above.
Once the holes are drilled in the angle, you can round off the edges of one end, then bolt them up to the shock linkage.
Next, offer the linkage up to the box tube and again varify that everything looks ok. If it all looks good, tack weld the angle to the box tube while you still have it bolted together to ensure that you have the correct gap between the angle pieces.
After it has been tacked, unbolt the linkages and weld the rest of the angle to the box tube. You should end up with something similar to the above pic.
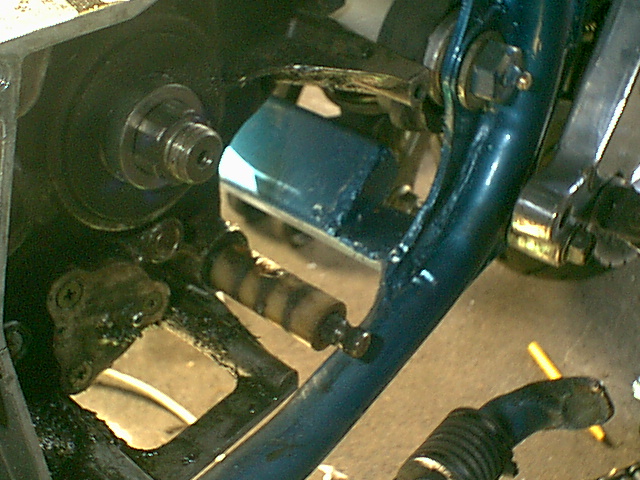
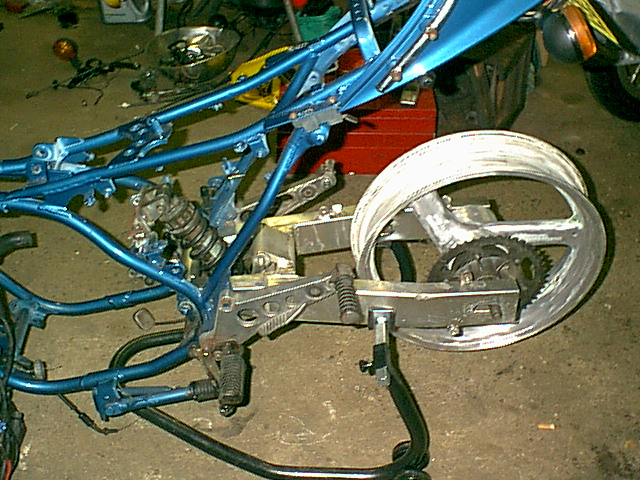
You now have all the mounting for the main parts of the swingarm done.
Heres some pics of the mounts all bolted up.
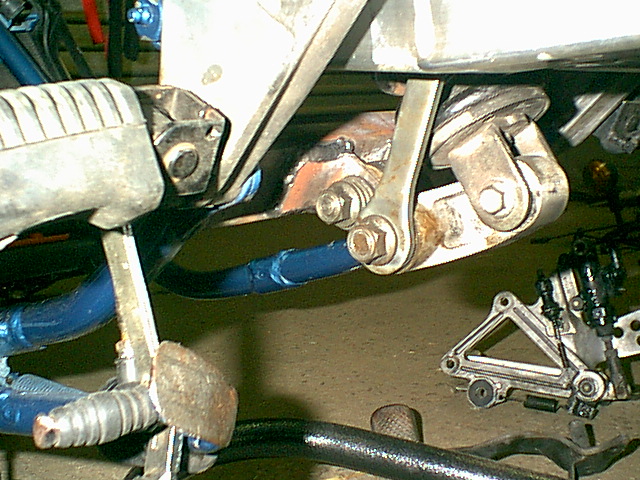
The next step was to weld another two brackets on the frame for the rear
brake setup. Firstly, you need a small bracket for the rear caliper stabiliser
bar.
For this, I used two more small pieces of the angle about 20mm long. One
of the pieces, I cut down the middle of the angle, leaving a flat peice of
metal. I rounded one end off each peice, then drilled them together. With
the swingarm in place, put the rear axle through the swingarm and the caliper
and offer the rod up to the new bottom mount on your frame. You should be
able to bolt the angle peices you made up to the caliper rod (you may need
to cut down the angle peice until its the right length for the other piece
to butt up to it nicely for welding. Once this is done, tack weld it in
place, remove the bar and finish the weld.
The second bracket is needed to mount the rear master cylinder. It can be seen on the left hand side of the frame in the pic below. I strongly suggest that you work out this bracket yourself because you will probably end up with a better job of it than I did. If you want to make it the same as mine, and you need more info, contact me for more measurements.
Edit: Since this conversion has become more popular, there are places making brackets for rear disc conversion on the LC.

Links engineering in the UK is one example.